Analyzing spatial data using Elasticsearch
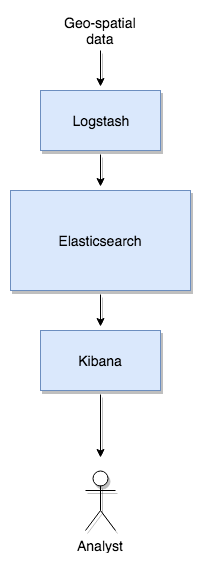
In this post I will show you how to analyze a spatial data set using the Elastic stack that consists of
- Elasticsearch
- Logstash
- Kibana

Elasticsearch stores the data and provides a RESTful search and analytics engine. Logstash is used to parse the input data and insert it into Elasticsearch. Kibana visualizes the data stored in Elasticsearch by providing a web UI.
All of these tools are developed by a company called Elastic. The source code is available on Github. The tools itself are free but for commercial usage usually the non-free component X-Pack is helpful.
The tools can easily be setup and tested on a local machine. Here we will use a Mac or Linux but Windows is supported as well.
The spatial data set
For our test we will use GPS trajectories from the Microsoft Geolife project. Download the data and unzip the file.
The spatial data is located in .plt files with content like
Geolife trajectory
WGS 84
Altitude is in Feet
Reserved 3
0,2,255,My Track,0,0,2,8421376
0
39.984094,116.319236,0,492,39744.2451967593,2008-10-23,05:53:05
39.984198,116.319322,0,492,39744.2452083333,2008-10-23,05:53:06
39.984224,116.319402,0,492,39744.2452662037,2008-10-23,05:53:11
...
The first 6 lines can be ignored. Columns 1 and 2 contain latitude and longitude, column 4 altitude, columns 6 and 7 date and time.
Getting the Elastic stack
Setting up the Elastic stack is easy as only files need to copied over to your local machine. Make sure that Java is installed on your machine as this is required by the three tools.
At first we will copy over Elasticsearch. Get the ZIP file from the download page and unzip it.
The next tool will be Kibana so go to that download page and get the version that fits to your platform. Unpack that as well using e.g. tar xzf kibana-6.0.0-darwin-x86_64.tar.gz.
Finally we will retrieve Logstash. From the download page get the ZIP file and unzip it as well.
Now your folder structure should look similar to
.
├── Geolife Trajectories 1.3
│   ├── Data
│   └── User Guide-1.3.pdf
├── elasticsearch-6.0.0
│   ├── bin
│   └── ...
├── kibana-6.0.0-darwin-x86_64
│   ├── bin
│   └── ...
└── logstash-6.0.0
    ├── bin
    └── ...
The versions you use are not that important. Probably newer version will work as well.
Startup
First we will start Elasticsearch. Open a terminal, goto your folder and type
cd elasticsearch-6.0.0
bin/elasticsearch
Elasticsearch will start and listen to port 9200. We could use curl to interact with the tool but we will use the more comfortable Kibana user interface for that.
Start a new terminal and type
cd kibana-6.0.0-darwin-x86_64/
bin/kibana
Kibana will start and connect to Elasticsearch. Now open you browser and point to http://localhost:5601. Ignore the request to configure an index pattern for the time being. We will do that later.
Data in Elasticsearch is organized in indices. We will create an index now and tell the tool which fields are special for us. Although you could insert data into Elasticsearch without having created an index before, there are advantages of creating one before like being able to create spatial queries.
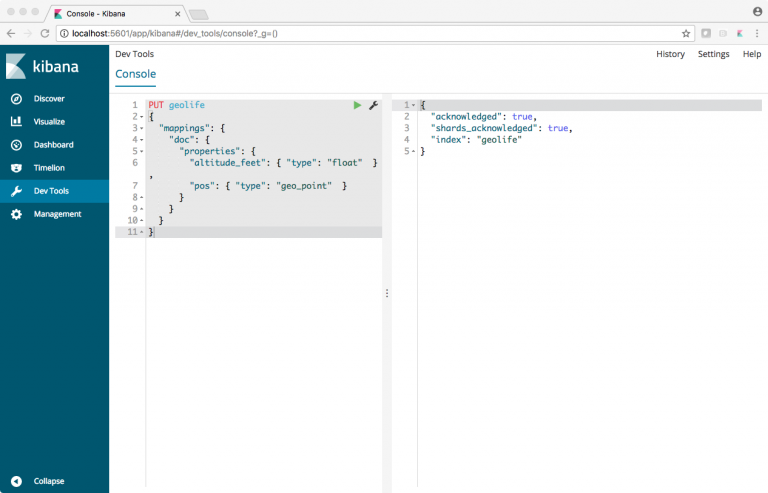
On the Kibana page in the left column there is an entry ‘DevTools’. Click on that. In the console enter the text
PUT geolife
{
  "mappings": {
    "doc": {
      "properties": {
        "altitude_feet": { "type": "float"  },
        "pos": { "type": "geo_point"  }
      }
    }
  }
}
Click on the green arrow to execute the code. It is then send to Elastisearch and you should get a result like

In case you get an error probably the index was there before. You can delete an index (and all its data) with DELETE geolife in the console.
Insert data
Now we are ready to insert data into Elasticsearch. The tool requires the data to be in JSON format. We will use Logstash to insert data as it provides a lot of features and one them is parsing CSV data which we need for our spatial data. Logstash requires a config file with the following structure:
input {
...
}
filter {
...
}
output {
}
The input must a stream like stdin, file, http and many more. We will use stdin for our work. File could be used as well but then Logstash would never end because it will continue listen to files.
In your main directory create a file geolife.conf with the following content:
input {
stdin { }
}
filter {
    csv {
        columns => ["lat", "lon", "zero", "altitude_feet", "days_since18993012", "date", "time"]
        convert => {
            "lat" => "float"
            "lon" => "float"
            "altitude" => "integer"
        }

        # create a combined date time such that we use it later for the timestamp
        add_field => { "date_time" => "%{[date]} %{[time]}" }

        # create a structure for geo point
        add_field => {
            "[pos][lon]" => "%{lon}"
            "[pos][lat]" => "%{lat}"
        }
    }
    mutate {
        # The conversion to float needs to be in a separate filter.
        # It does not work if we move it to CSV above
        convert => {
            "[pos][lon]" => "float"
            "[pos][lat]" => "float"
        }
    }
    date {
        # create the timestamp
        match => [ "date_time", "yy-MM-dd HH:mm:ss" ]

        # remove obsolete fields in orer to save space in the index
        remove_field => [ "date", "time", "date_time", "lat", "lon", "message", "zero", "days_since18993012" ]
    }
}

output {
  elasticsearch {
      hosts => ["localhost:9200"]
      index => "geolife"
    }
    # stdout { codec => rubydebug }
}
Then open a new terminal and type
cd logstash-6.0.0
find ../Geolife\ Trajectories\ 1.3/ -name '*.plt' -exec head -n+7 {} \; | bin/logstash -f geolife.conf
That will search all .plt files, remove the first 6 lines and pipe the rest to Logstash. It may take a while.
After that all the data has been inserted into Elasticsearch and you are ready to analyse the data which will be explained in a future post.
